Spring Security 소셜 로그인 로직 구현하기
Table of contents
- 1. application-oauth 추가
- 2. apllication.yml 추가
- 3. SecurityConfig 설정
- 4. EmployeeProfile 설정
- 5. OAuthAttributes 설정
- 6.CustomOAuth2UserService 설정
- 7. Oauth2SuccessHandler 설정
- 8. Oauth2FailureHandler 설정
- 9. 테스트
소셜 로그인 연동 부분을 맡으면서 많은 의문이 있었다.
예를 들어, 구글 로그인을 해서 인증을 받고, 구글로부터 받은 사용자 정보를 서버가 관리하는 DB에 저장하고나서
jwt 토큰을 어떻게 부여하고 접근 권한을 제한할 수 있을까에 대해 고민을 많이 했다.
일단은 소셜로 가져온 데이터를 이용해서, 인증 성공 시 토큰을 쿼리파라미터로 전달하고
전달받은 토큰을 쿠키에 저장하는 방식으로 구현하였다.
어떻게, 해결하긴 한 것 같은데 참고할만한 자료가 많이 없어서 내가 한 방식이 맞는지는 모르겠다..(이렇게 구현한 사람을 보진 못했다.ㅎ)
일단 소셜 로그인 인증에 성공하면 세션에 이름을 띄우는 과정을 진행해보겠다.
1. application-oauth 추가
//application-oauth.yml
spring:
  security:
    oauth2:
      client:
        registration:
          google:
            client-id: <구글에서 받아온 아이디>
            client-secret: <구글에서 받은 비밀번호>
            scope: profile,email
            client-authentication-method: POST
          naver:
            client-id: <네이버에서 받아온 아이디>
            client-secret: <네이버에서 받아온 비밀번호>
            redirect-uri: "{baseUrl}/{action}/oauth2/code/{registrationId}"
            authorization_grant_type: authorization_code
            scope: name,email,profile_image
            client-name: Naver
            client-authentication-method: POST
        provider:
          naver:
            authorization_uri: https://nid.naver.com/oauth2.0/authorize
            token_uri: https://nid.naver.com/oauth2.0/token
            user-info-uri: https://openapi.naver.com/v1/nid/me
            user_name_attribute: response
app:
  oauth2:
    authorizedRedirectUri: "http://localhost:8080/oauth2/redirect"
구글, 네이버로부터 허가 받은 client-id와 client-secret을 입력해야한다.
네이버는 Spring에서 공식 지원하지 않으므로 provider 부분을 추가해주어야 한다.
위 application-oauth.yml 을 채우는 방법은 인터넷에 참고자료가 많으니 따로 추가하지 않겠다.
그리고 이 보안이 필요한 비밀번호는, 배포할때 환경변수로 넣어주어야 할 것 같다. 그 부분은 팀원들과 상의를 해봐야겠다.
2. apllication.yml 추가
// application.yml
spring:
  profiles:
    include: oauth
위 설정을 추가해야
application-oauth.yml에 작성한 내용이 포함된다.
3. SecurityConfig 설정
@EnableWebSecurity
@RequiredArgsConstructor
public class SecurityConfig {

    @Value("${jwt.token.secret}")
    private String secretKey;


    private final EmployeeService employeeService;

    private final Oauth2SuccessHandler oauth2SuccessHandler;
    private final Oauth2FailureHandler oauth2FailureHandler;

    private final CustomOAuth2UserService customOAuth2UserService;

    @Bean
    public SecurityFilterChain securityFilterChain(HttpSecurity httpSecurity) throws Exception {
        return httpSecurity
                .httpBasic().disable()
                .csrf().disable()
                .cors().and()
                .sessionManagement()
                .sessionCreationPolicy(SessionCreationPolicy.STATELESS)
                .and()

			   ......

                .oauth2Login().loginPage("/login")
                .and()
                .oauth2Login()
                .userInfoEndpoint()
                .userService(customOAuth2UserService)
                .and()
                .successHandler(oauth2SuccessHandler)
                .failureHandler(oauth2FailureHandler)
                .and()

                .....

                .addFilterBefore(new JwtTokenFilter(employeeService,secretKey), UsernamePasswordAuthenticationFilter.class)
                .build();

    }

}
SecurityConfig 파일을 위와 같이 설정해준다.
.oauth2Longin.loginPage("/login")설정은, 소셜 로그인 요청을 보낼 페이지를 설정하는건데, 명시하지 않으면 이상한 기본 화면이 나오므로 소셜 로그인 버튼이 있는 url을 적어준다.인증이 성공하면
.userService(customOAuth2UserService)에 명시해둔customOAuthUserService로직이 실행될 것이다.그리고 이 과정에서 문제가 없으면
.successHandler(oauth2SuccessHandler)에서 설정해둔 로직대로 실행될 것이고문제가 발생하면
.failureHandler(oauth2FailureHandler)에서 설정해둔 로직대로 실행될 것이다.
4. EmployeeProfile 설정
package com.project.myacademy.global.configuration.oauth;

import lombok.Builder;
import lombok.Getter;

@Builder
@Getter
public class EmployeeProfile {
    //Resource Server마다 제공하는 정보가 다르므로 통일시키기 위한 profile
    private final String name;
    private final String email;

    public EmployeeProfile(String name, String email) {

        this.name = name;
        this.email = email;

    }
}
내가 구현하는 서비스는 User 대신 Employee 라는 테이블 명을 사용하므로
EmployeeProfile이라고 명명하였다.소셜마다 제공하는 키 값이 일치하지 않아 만든 dto 같은 개념의 클래스이다.
나는 이름과 이메일만 받아보도록 할 것이다.
5. OAuthAttributes 설정
public enum OAuthAttributes {

    GOOGLE("google", (attributes) -> {
        return new EmployeeProfile(
                (String) attributes.get("name"),
                (String) attributes.get("email")
        );
    }),
    NAVER("naver", (attributes) -> {
        Map<String, Object> response = (Map<String, Object>) attributes.get("response");
        return new EmployeeProfile(
                (String) response.get("name"),
                (String) response.get("email")
        );
    });

    private final String registrationId;
    private final Function<Map<String, Object>, EmployeeProfile> of;

    OAuthAttributes(String registrationId, Function<Map<String, Object>, EmployeeProfile> of) {
        this.registrationId = registrationId;
        this.of = of;
    }

    public static EmployeeProfile extract(String registrationId, Map<String, Object> attributes) {
        return Arrays.stream(values())
                .filter(provider -> registrationId.equals(provider.registrationId))
                .findFirst()
                .orElseThrow(IllegalArgumentException::new)
                .of.apply(attributes);
    }
}
google에서 받아온 정보와 네이버에서 받아온 정보 구성이 달라서 만든 클래스이다.
위 클래스로 EmployeeProfile 클래스의 name 에는 소셜 로그인 인증자의 이름이,
email에는 소셜 로그인 인증자의 email 정보가 입력될 것이다.
// 구글
{sub=XX, name=XX, given_name=XX, family_name=XX, picture=XX, email=XX, email_verified=XX, locale=XX}

//네이버
{resultcode=XX, message=XX, response={id=XX, profile_image=XX, email=XX, mobile=XX, mobile_e164=XX, name=XX}}
받아오는 attributes 를 로그를 찍어보니 구조가 위와 같다.
어떤 사용자 정보를 받아올지 설정한거에 따라 구조는 달라질 수 있다.
네이버의 경우 attribute 안의 response 안에 주요 정보가 들어있다.
6.CustomOAuth2UserService 설정
@Service
@RequiredArgsConstructor
@Slf4j
public class CustomOAuth2UserService implements OAuth2UserService<OAuth2UserRequest, OAuth2User> {

    private final EmployeeRepository employeeRepository;
    private final HttpSession httpSession;

    @Value("${jwt.token.secret}")
    private String key;

    @Override
    public OAuth2User loadUser(OAuth2UserRequest userRequest) throws OAuth2AuthenticationException {
        OAuth2UserService<OAuth2UserRequest,OAuth2User> delegate =
                new DefaultOAuth2UserService();

        // 소셜에서 인증받아서 가져온 유저 정보를 담고 있다.
        OAuth2User oAuth2User = delegate.loadUser(userRequest);

        // 어떤 서비스인지(구글, 네이버 등등) -> 로그 찍어보면 naver 혹은 google 이 나온다.
        String registrationId = userRequest.getClientRegistration()
                .getRegistrationId();

        log.info("🌈 소셜 인증한 서비스 [{}]",registrationId);


        // OAuth2 로그인 진행 시 키가 되는 필드 값, 구글은 sub 네이버는 response 라는 이름을 갖는다.
        String userNameAttributeName = userRequest.getClientRegistration()
                .getProviderDetails()
                .getUserInfoEndpoint()
                .getUserNameAttributeName();

        Map<String, Object> attributes = oAuth2User.getAttributes();

        //서비스 마다 다른 키와 벨류 값을 변환하여 객체를 만든다.
        EmployeeProfile employeeProfile = OAuthAttributes.extract(registrationId, attributes);

        // 소셜 로그인으로 들어온 이메일과 같은 이메일로 가입된 회원의 실명 + 이메일이 동일한 경우 승인
        Employee employee = check(employeeProfile);


        // 로그인 성공하면 세션에 회원 실명 저장
        httpSession.setAttribute("name",employee.getName());

        // 해당 계정이 갖고 있는 권한 그대로 주입
        return new DefaultOAuth2User(
                Collections.singleton(new SimpleGrantedAuthority(employee.getEmployeeRole().name())),
                attributes,
                userNameAttributeName);

    }

    // 소셜 로그인 시, 소셜 로그인에 등록된 실명과 이메일로 가입한 회원이 존재하지 않을 경우 null
    private Employee check(EmployeeProfile employeeProfile) {
        Employee employee = employeeRepository.findByNameAndEmail(employeeProfile.getName(), employeeProfile.getEmail())
                .orElseThrow(() -> new OAuth2AuthenticationException("가입된 회원이 아닙니다."));

        return employee;
    }

}
위 부분은, 사람마다 자신의 프로젝트에 적용하고 싶은 로직을 추가하면 된다.
나같은 경우는 소셜 로그인으로 받아온 이메일과 실명으로 가입된 회원이 db에 존재하는 경우에만 로그인 성공 처리를 진행하였고, 실명과 이메일로 가입된 회원이 없는 경우
OAuth2AuthenticationException에러를 던지도록 구현하였다.에러가 실행되면
Oauth2FailureHandler로직이 실행될 것이고, 에러가 없다면Oauth2SuccessHandler로직이 실행될 것이다.
7. Oauth2SuccessHandler 설정
@Component
@Slf4j
@RequiredArgsConstructor
public class Oauth2SuccessHandler extends SimpleUrlAuthenticationSuccessHandler {

    @Value("${jwt.token.secret}")
    private String key;

    @Value("${app.oauth2.authorizedRedirectUri}")
    private String redirectUri;

    private String targetUrl;

    private final EmployeeRepository employeeRepository;

    @Override
    public void onAuthenticationSuccess(HttpServletRequest request, HttpServletResponse response, Authentication authentication)
            throws IOException, ServletException {

        OAuth2User oAuth2User = (OAuth2User)authentication.getPrincipal();

        // 구글 인증시 아래 로직
        String realName = (String)oAuth2User.getAttribute("name");
        String email = (String)oAuth2User.getAttribute("email");
        log.info("🌈 구글 인증 시 이름 추출 [{}] || 이메일 추출 [{}]",realName,email);

        Map<String, Object> attributes = oAuth2User.getAttributes();

        // 네이버 인증 시 아래 로직
        if(attributes.get("sub")==null){
            Map<String, Object> response2 =(Map<String, Object>) attributes.get("response");
            realName = (String) response2.get("name");
            email = (String) response2.get("email");
            log.info("🌈 네이버 인증 시 이름 추출 [{}] || 이메일 추출 [{}]",realName,email);
        }

        // 이름과 이메일이 둘다 일치하는 회원이 저장되어있을 것
        Employee foundEmployee = employeeRepository.findByNameAndEmail(realName, email).get();
        String foundAccount = foundEmployee.getAccount();
        log.info("🌈 소셜 로그인 인증한 계정명 [{}]",foundAccount);


        // 회원 계정으로 토큰 생성 후 쿼리 파라미터로 보냄
        String token = JwtTokenUtil.createToken(foundAccount,key,1000*60*60);

        targetUrl = UriComponentsBuilder.fromUriString(redirectUri)
                .queryParam("token", token)
                .build().toUriString();

        clearAuthenticationAttributes(request);
        getRedirectStrategy().sendRedirect(request, response, targetUrl);
    }
}
성공 로직은 위와같이 구성하였다.
로그인이 성공되었다면, jwt 토큰을 생성하여 redirecturl로 설정한 url로 쿼리 파라미터로 보내도록 하였다.
쿼리파라미터로 보내는게 맞는 방법인지는 아직 모르겠다. 보안상 문제가 있을 것 같기도 한데…
일단 백엔드 분야만 아는 내가 할 수 있는 최선의 방법이었다…😥
application-oauth.yml 설정에서 redirecturl을
http://localhost:8080/oauth2/redirect로 설정했으므로위 url로 전송될 것이다.
쿼리파라미터로 받은 jwt 토큰을 쿠키에 저장한 뒤, home 화면으로 다시 redirect하는 로직으로 구현하였다.
8. Oauth2FailureHandler 설정
@Component
@Slf4j
@RequiredArgsConstructor
public class Oauth2FailureHandler implements AuthenticationFailureHandler {

    @Override
    public void onAuthenticationFailure(HttpServletRequest request, HttpServletResponse response, AuthenticationException exception) throws IOException, ServletException {
            response.sendRedirect("/oauthFail");
    }
}
소셜 로그인으로 받아온 실명과 이메일로 가입된 회원을 찾지 못하는 경우 이 로직을 거치게 된다.
일단은, 단순하게
/oauthFail로 redirect하여 에러 페이지를 보여주도록 간단히 구성하였다.
9. 테스트
먼저 내 계정으로 실험을 해보겠다.
내 구글 이메일 계정과 내 실명이 db에 없는 경우에는 에러처리가 되어야 하고, 있다면 정상적으로 로그인이 되어 session에 저장된 내 이름을 홈화면으로 표시되어 확인할 수 있으면 성공이다.

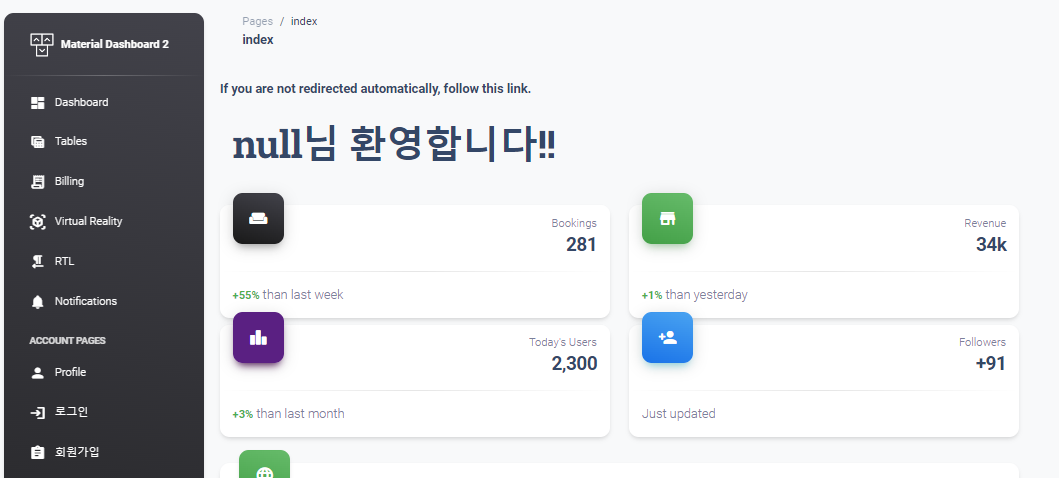
아직 로그인 되기 전이라 null 님 환영합니다가 표시된다. (일단 대충 화면에 표시되도록 구현했다)
로그인에 성공해서 세션에 실명이 저장된다면 정상적으로 표시될 것이다.

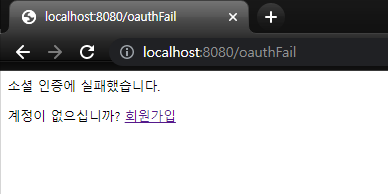
현재 DB에는 내 실명과 이메일로 가입된 회원이 존재하지 않는 상태이다.
따라서 내가 구현한 로직에 따라, 소셜 로그인 요청 시 에러가 발생할 것이다.

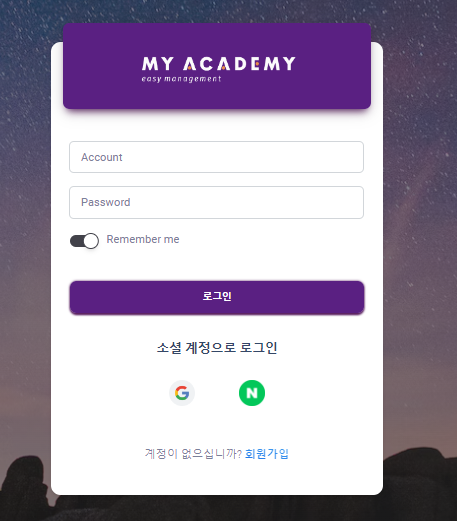
구글 로그인 버튼(th:href=”@{/oauth2/authorization/google}” 로 연결되도록 하는) 을 클릭하겠다.
참고로 이 버튼이 있는 url 은 SecurityConfig에서 설정해둔
"localhost:8080/login"이다.

내 의도대로, 내 실명과 이메일로 가입된 회원이 없어서 에러처리를 해둔 화면으로 이동했다.

임의로 내 이메일과 실명을 갖는
ROLE_USER권한을 갖는 데이터를 입력하였다.그리고 다시 소셜 로그인을 시도해보겠다.

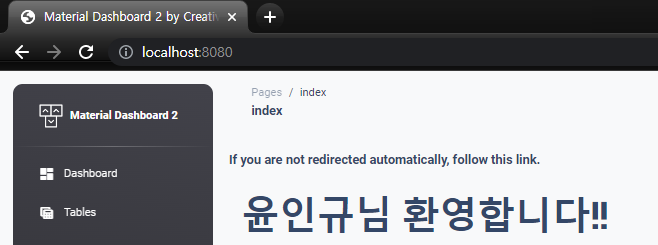
이미 존재하는 데이터가 있어서, 인증에 성공했고 내 이름을 정상적으로 출력할 수 있게 되었다.